Showing posts with label DIY. Show all posts

8/14/12

DIY Wine Bottle Animal Stopper

Hey friends! Happy Tuesday- it's time for another DIY with Grace over here. I'm especially excited about this one. Ever have a bottle of wine that you want to save, but just cannot get that cork back inside? This DIY will help out, and in style :)


What you'll need:
Glue gun/glue sticks
Cork stoppers
White spray paint
Some animal friends (I bought mine at a farm supply store)


1. Give the little guys their first coat of paint. Don't worry about covering everywhere, as they will need several coats.
2. Spray another coat onto the animals, and make sure you turn them upside down, side to side and back on their feet to cover every bit of them.


3. After they have dried, take your glue gun and dab an even amount of glue on the animals belly (or directly onto the corks top). Then stick the animal to the cork!


4. Repeat with all of your chosen critters, and let them dry for a minute or two.


5. Pop them on your favorite wine and enjoy their sweet drink savin abilities!

7/18/12

DIY Flower Crown


Hey friends! I have another DIY project with the lovely Grace Fennimore! You're going to love this one. Perfect for summer :)


I think a lot of girls dream about wearing flower crowns on a daily basis (or maybe that's just me), so I decided to make one just for fun. I may be wearing it to clean the house more often, just to make things a bit more whimsical. That may be weird, but as my momma always says "hey, I'm weird but fun!", and you can't deny floral crowns make things more fun.


Here's what you'll need:

- 4 to 5 different types of flowers (I used fake ones for an actual lifespan), Choose 2 or three that will be the ones to pop!
- scissors
- floral wire
- Needle

Step one-
Wrap the wire around the crown of your head to make sure it will fit snuggly but comfortably. Measure another time around, and begin wrapping it around the first wire circle.

Step two-
After you have created a sturdy base, start adding flowers. To attach them, poke a hole through the stem with the needle and psuh the wire through. Tightly wrap the wire around the stem 2 or 3 times. Then poke the wire attached to the flower between your crown frame, and wrap the end around it. Don't worry if the wires start to look messy as you add on flowers, it won't show!


Step three-
Continue adding flowers anyway you want. You can cover the entire frame, or just do 3/4 of it like I did.


Step four-
Put that crown on your head and start dancin. Happy frolicking!

While doing this, I couldn't help but think of this lyric from Mumford and Sons "After the Storm" It just seemed perfect. The full lyrics go "And there will come a time, you'll see, with no more tears. And love will not break your heart, but dismiss your fears. Get over your hill and see what you find there, With grace in your heart and flowers in your hair." 


Happy Wednesday everyone!

6/14/12

A New Series...

Hey Friends! Happy Wednesday! I'm so excited to be introducing a new series we'll be having here regularly on the blog! It has to do with awesome creative projects easy enough for anyone to pull off... 


Grace and I met on a trip to Uganda, Africa while we were both in college- and we've been buddies ever since. This girl seriously has talent for creating... I mean you walk into her house, and anything that screams cute, she made herself. She's the queen of DIY and doesn't even realize how talented she is. Not only is Grace humble, but she's an amazing friend who views life in such a beautiful way. She's one person who I feel completely comfortable telling anything to- our conversations always leave me inspired. Not to mention- she loves coffee just as much as me, which is totally a friendship bonus!


I know I keep mentioning this- but I AM getting ready to launch a new site (these things take time!) I asked Grace to come along and be my first regular contributor to my new and improved blog! She was so kind to say yes :) Needless to say, my new site is not up yet, but Grace started sending me projects and I couldn't help but post one! Just think of it as a sneak peak to all the goodness that's to come! 

So here it is, project #1!

What you'll need:

- Three small plants that will do well indoors (I would use succulents, herbs, or different types of fern)
- One 2x4 and a handsaw if you will be cutting it shorter
- Three mason jars
- Three silver things (I honestly have no idea what they are, I just know they live in the plumbing section at Home Depot. If you take a mason jar with you, pick the one that fits snugly around the mouth)
- Nails
- Small rocks or pebbles
- Fresh dirt

This project is a little more about spacing and placing according to what you feel looks right, so I'm throwin inches and precision out!


STEP ONE: Place the metal fasteners at even distances on your piece of wood.
Take the first mason jar, fit the fastener around it and nail that bad boy down (easy peasy). Repeat with the other two, spacing them evenly along the board.


STEP TWO: Put a few pebbles or small rocks in the bottom of your mason jars to make sure your little planties get plenty of drainage. This way you can watch the water level to make sure you don't drown the poor fellas.

STEP THREE: Fill each mason jar about halfway up with dirt.


STEP FOUR: Hang them. You may want to nail directly through the board, or drill holes in the back for hanging (I did both for extra support).


Now sit back and enjoy your little wall forest!

You can tweak this how ever you want. Maybe spray paint the fasteners gold, or paint the wood a bright color, use your creativity!


Thanks so much Grace! Looking forward to more DIY's!! (And a new blog- it's coming I promise!)

5/25/12

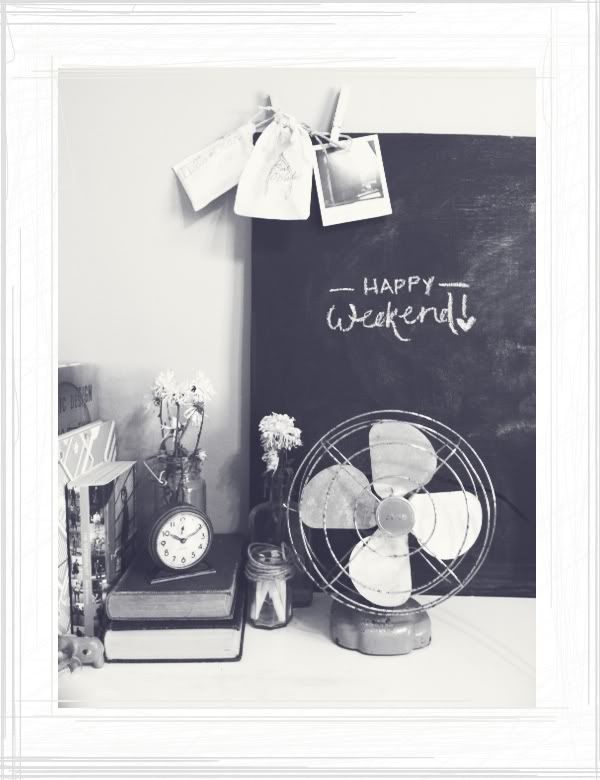
It's that time again...

Photobucket

Weekend! I thought I'd get outside the computer and write you a happy weekend note on my chalkboard today, instead of using my tablet like usual. Feels good to switch it up every now and again.

Incase you missed it, this week on the blog I did a tutorial on using your tablet to add hand-written words to your blog posts. I also did a little DIY post over on Kelli Murray explaining how to send your far away friends a coffee care package!

So... I'm getting ready to launch a new website pretty soon here- and I need some good pics of myself. (That sounds weird, but in this internet world where you don't see people face to face, I think good photos are key!) I'm so excited to do a little photo shoot with Kristin Rogers this weekend! (She's the one I blogged about here) I'm also nervos, I hate getting my picture taken, and yet, it's so much fun to dress up and be pretty for the day. I hope you all have a wonderful and relaxing 3-day weekend friends.

Enjoy it!!

5/24/12

DIY Coffee Care Package!


Hey guys! I am pleased to announce (and totally honored) to have done a little DIY guest post for Kelli Murray over on her blog today! Kelli has been one of my artistic inspirations for many years now, so to have the chance to do something on her blog was so exciting for me :)

The post is all about showing the ones you love that you care about them. And being a huge coffee lover, what better way to do that then sending them a care package full of your favorite coffee items?! I had a great time putting it together and can't wait to send off the package!

Check out the post here!

Happy Thursday friends!

10/27/11

DIY Halloween!

Photobucket
Halloween is soo close. I really just realized this yesterday. This weekend there are a bunch of
Halloween parties going on and you're gonna need to dress up. Here are some fun DIY tutorials
I found around the web- thought I would share them with you.
Photobucket
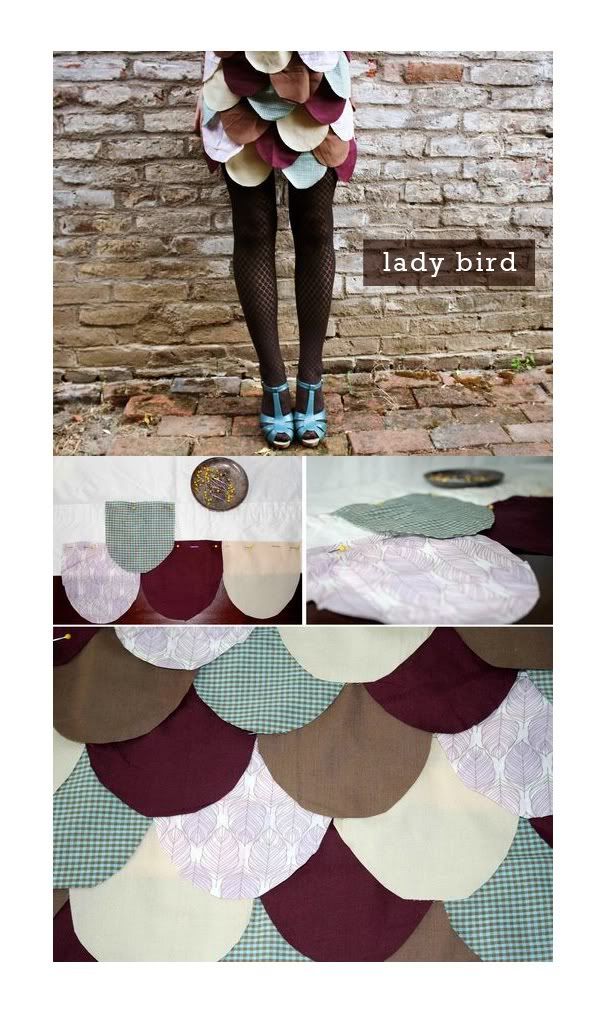
From the amazing blog A Beautiful Mess. I think this lady bird costume is just too cute.
Here's how to make it.


Photobucket


Let's face it. Sometimes it's just fun to put on gnarly lashes. Halloween is a great excuse!
A little tutorial for ya here.


Photobucket


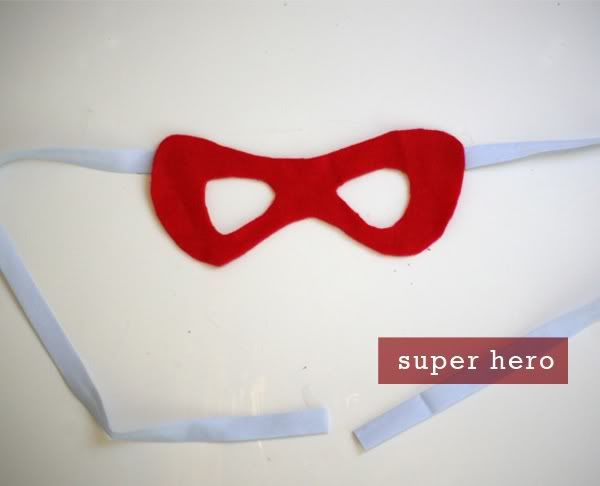
This is the quickest and easiest thing to make! Throw it on with any sort of clothing and say you're
a super hero. This is for that day of, "shoot! I need something to wear to that party tonight!"
See the easiest instructions ever here.


Photobucket

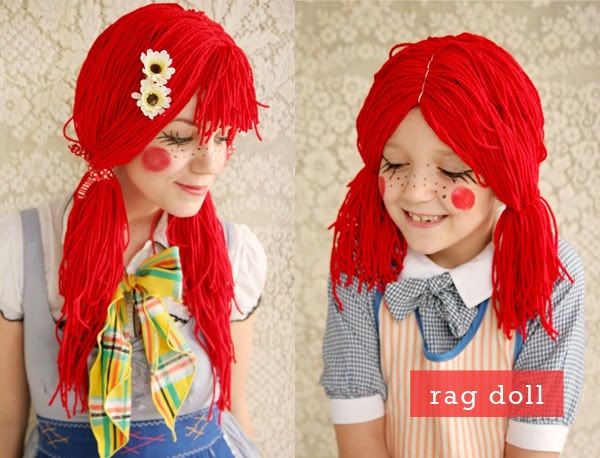
And another one from A Beautiful Mess- the rag doll. Just too cute. Remember Raggedy Ann?
What ever happened to her? Here's the tutorial for this little number.


Happy costume making and Happy Thursday!

skipping pandas photo source.

9/22/11

Another Craigslist Adventure


So now that we have our fridge all chalkboard-y, we have our next Craigslist adventure.

Re-creating this Restoration Hardware coffee table.

We bought an old cart very similar to the actual vintage ones they use at RH- with the original
cast iorn wheels and wood. This thing is built to last! Except instead of paying thousands of dollars
at RH, we paid $50 on Craigslist. Gotta love that site.

This project is going to be attempted this weekend- we will see how it goes and I will definitely be
blogging through the process! Hopefully by the end we'll have a wonderful new (to us) coffee table.

If Restoration Hardware can do it- we can too, right??

Happy Thursday everyone!

9/2/11

Muffin Tin Makeovers

So here is the 2nd post on the "What to do with your" column! Today's post is on what to do
with your old muffin tins. Maybe the one thats rusting a bit in the back of your cabinet. Maybe you
just got a new set of Martha Stewart muffin tins and don't know what to do with your old ones?

Well turns out there's tons of stuff you can do with those guys!
Check out some of these fun projects:


Don't forget you can always paint the tins to give them a little extra pizazz, or to have them
match the colors in your home.

Here are the tutorials on how to accomplish each of these:

Plant Holder | Drawer Organizer | Art #1, #2 | Serving Tray

There's also a few more fun things you can do with these muffin tins, like make your own crayons
and for those moms or babysitters out there, make a kids meal.

Happy muffin tinning friends.

8/29/11

It is Finished!

So I told you this weekend Nolan and I were going to transform our tagged up fridge-
we actually did it and couldn't be happier with the results! It really wasn't too hard,
all it takes is a little bit of time, the right supplies and some good help (having a handy man
around is so awesome).

So I documented the whole thing and have a little tutorial laid out for you, incase you're ever
in need, or want to for fun, create a chalkboard refrigerator :)

Here you go!


Its that easy. Now we don't have to feel too gangsta when we walk into our kitchen. I love
our new fridge and can't wait to see how we use the chalkboard. I'm thinking love notes,
grocery lists, and possibly some quotes like "where's the frat party at?" Those are always great.

If you have any questions feel free to email me.

Has anyone else done a project like this before? How did it go? I'd love to hear about it!

Thanks guys and happy Monday!

8/26/11

The Wonders of Craigslist


Yup. This is our kitchen and this is our fridge. And yes, that is graffiti. All over it.

One thing I know for sure- when your newly married
and have no money, craigslist is your best bud.
And thats where we found this wonder.

So we do actually have a vision for this piece of art... It fits perfectly in our tiny kitchen,
we got an amazing deal on it, and despite what it may look like, its actually a fairly new fridge and a
good brand.

So here's the vision part: this weekend, we are going to magically transform this ghetto tagged up fridge into something that looks a bit like this:


A beautiful chalkboard fridge! Here's the tutorial on how we're gonna make it.

I'll document the whole thing so you can share in the joy of this transformation with us.
I'm pretty excited about it, although this one has kinda grown on me in a weird,
strange way...

But until then, we have a tagged up frige. Its cool. Literally! ha

8/24/11

What to do with your...

So this blog post is dedicated to a friend who recently asked me what she should do
with her old vintage suitcases. I got really excited at the question, as I've been brainstorming
 the exact same thing after having so many suitcases leftover from our wedding decorations.
So instead of emailing her back, I'm replying with this blog as well as introducing a new column!
Its called "What to do with your..." (super creative, I know, but I like to keep things simple!)

Every so often (when the inspiration is right) I'll post a "What to do with your..." and give
various ideas on what you can do with the everyday items you may have around your house.
You know those things that you hold on to because you think- "I can totally do something cool
with this, so I'but I just don't know what." So you keep it forever and then end up throwing it
 away probably because someone in your household tells you to get rid of it cause you're never
gonna do anything with it. THOSE kind of things :)

So here is post numero uno on vintage suitcases! Enjoy!


And the best thing about suitcases in some instances, such as the end tables, they double as storage
containers! You could also modify this and turn it into a coffee table. Stylish and functional.


Find more info on these wonderful crafts here:

CHAIR : MEDICINE CABINET : END TABLE : PET BED


8/23/11

DIY Times


Decorating and putting together our house has made me really start looking at home DIY projects like never before. Even things like how to store cans better in your pantry are now helpful to me! (Use a magazine holder) Nolan and I both love to cook, (he's better) and come up with fun ways to have our home be functional while looking good. Its so much fun coming up with ideas together, and it doesn't hurt that he is so handy and can actually accomplish a lot of the ideas we come up with.

Here are some fun homey projects I've found on my web inspiration journeys.

Crock Pot Dinners: So simple, but so great to do and have. You can just grab a bag in the morning before heading to work and not worry about spending money on lunch! Home late and no time or money for dinner? Open up a bag- its always tasty and convenient!

Mason Jar Herb Garden: Great decoration while being functional. Better Homes and Gardens says that virtually any herb can be planted in a mason jar- and its always fresh ready for use when cooking. I'm definitely making a few of these for our kitchen :)

Vintage Chair Shelf: Not sure if we would ever put these up in our house, but it just goes to show how creativity and using what you have around can go a long way. I think something like this would be really cute in a garden area holding plants, gardening gloves and watering cans.

So much inspiration and fun to be explored. All it takes is a little time and determination to add these fun little touches to your home.

If you're on Pinterest- (follow me!) I found a lot of these ideas on this DIY board! Follow it for tons of awesome DIY ideas!

7/8/11

Two Things Making Me Happy


Two things are making me excited...

These black high-wasted shorts I found at a garage sale last weekend,
and this DIY project I'm working on for our wedding... Its getting so close!

6/27/11

Photobucket

Hello Readers! I'm headed out of here for a mini getaway up the coast to my hometown.

I find I get so much more work done when I'm out of my house, in an inspiring place.
So thats exactly what I've decided to do. Go to an inspiring place and work. Thats the great thing
about working from your laptop- you can take it anywhere! I'm so excited to head to the water and
hang with out my sis and home town friends.

While I'm up there, I also plan on working on these and these little crafys for the wedding :)
Hey 101, get ready to spend some time with me and my Camry.

source.

6/17/11


As I'm brainstorming about decorating Nolan and I's new apartment, I came across these wonderful
wall ideas! Who wants to simply paint their walls when you could create your own architecture with sharpie??
Too cool for school. You could also do these textured wall stripes or put dictionary pages all over.

The how-to for these as well as a few other fun ideas are over here. So fun!

I really want to do the sharpie thing... I wonder if Nolan would let me....

6/15/11

Paper Scraps

Photobucket

I hate having to throw things away, its something I'm learning how to do.
I just can't help but think, "I can use these sometime in the future!"
A few years later they're still in the "I'll use these one day" box.

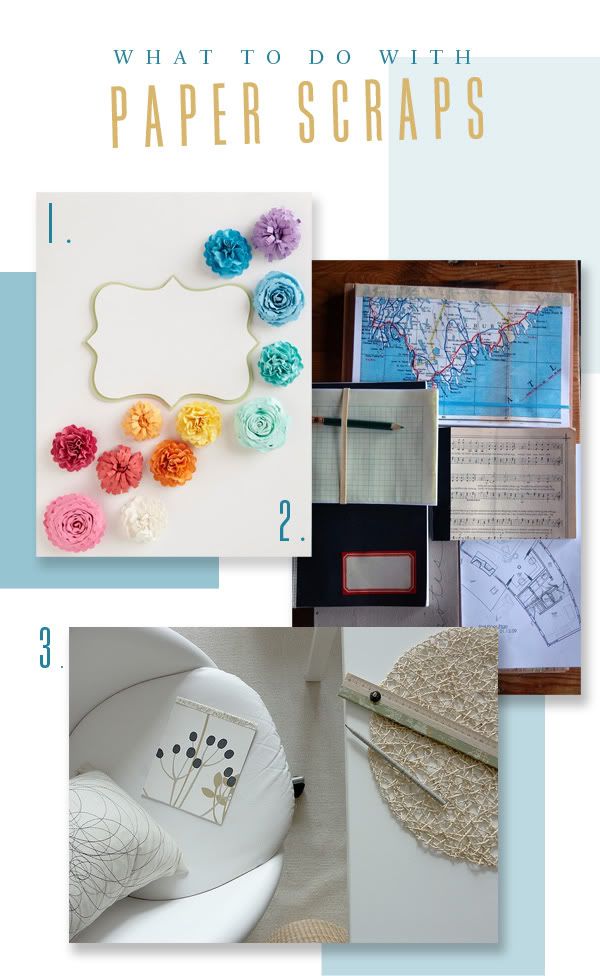
I have a ton of paper scraps collected over the years, and have rounded
up some DIY's on what you can do with those guys! If you have a ton of
scraps you just can't throw away, maybe try one of these crafts to turn them
 into something you'll actually love and use!


1: Paper Scrap Flowers. Limited only by your creativity.
The uses for these are endless!

2: Recycled Paper Notebooks. Gifts, journals, sketchbooks, scrapbooks.
Fun times.

3: Book Cover and Freshened Up Ruler! Paper scraps can cover an
already existing journal or book, line a ruler that needs a bit of freshness,
or even cover a pencil or scissors.

6/3/11

Jars and Tins

Photobucket

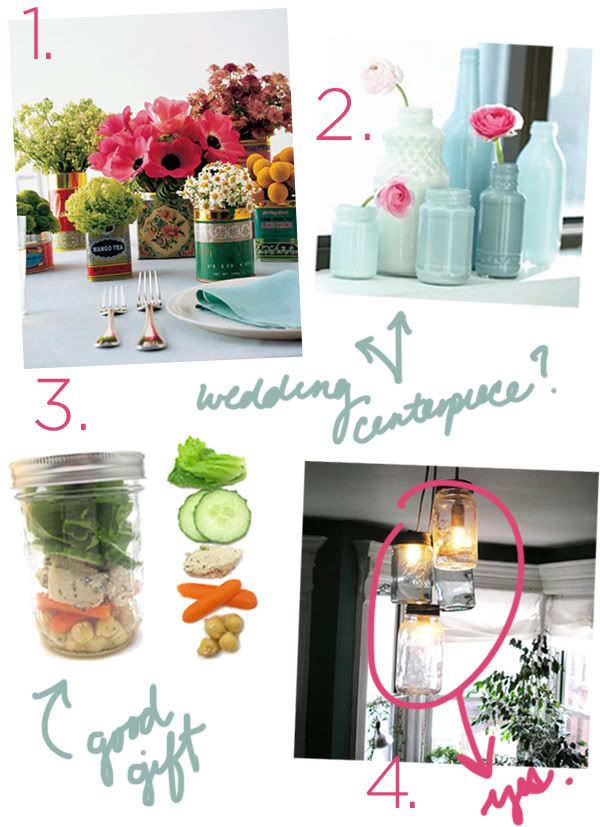
There's something about a good mason jar (or a tea tin) that makes me want to create something awesome!

The options are endless, but here are a few great ideas of what you can do with these guys:

1: Take vintage tea tins and use them as centerpieces / garden pots / backyard decoration. Learn how here.

2: Paint them! Simple but makes such a statement.

3: Make a mason jar meal! There's instructions as well as other fun mason meal jar how-tos here.
(thanks Black*Eiffel for that find)

4: Make a sweet light fixture! Design*Sponge always has amazing DIYs and this one does not fall short.
Check out how to make it here.

5/24/11

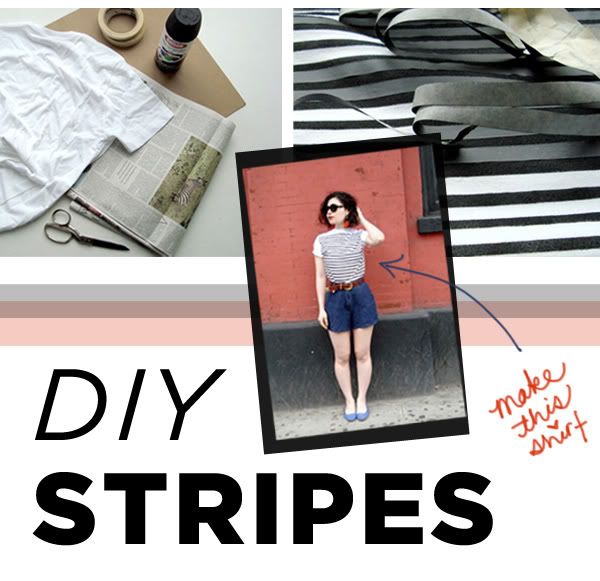
Make Your Own Stripey Shirt!

Photobucket

If your a poor kid like me, love the stripe trend going on right now but can't afford to go shopping- make your own awesome striped shirt! Refinery29 has this easy DIY on how you can pull this off. I'm not extremely crafty and I think even I could do it- so its kinda exciting. All you need is some tape, black spray paint, and a white t-shirt!

Click here for the instructions!

Easy Peasy! And oh so cute!
Related Posts Plugin for WordPress, Blogger...