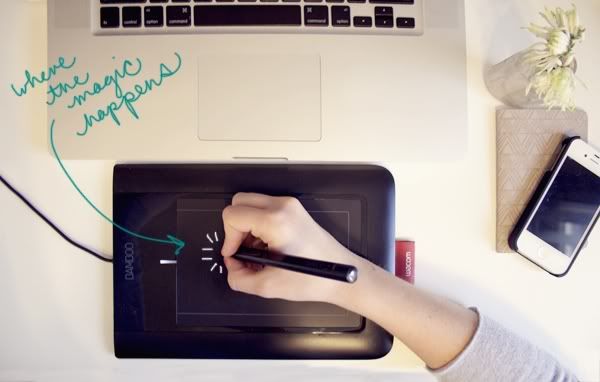
Oftentimes I use my own handwriting in my posts. I've always loved doing things by hand. When I first changed my major to graphic design, I was literally scanning everything into the computer, (including my own handwriting) just so I could get things looking the way I wanted. I didn't know the computer very well then, so I felt like it was just stopping me from creating the art I wanted to make.

Now that I know better, there are so many faster ways to create handwritten work right on the computer- one of them being writing with the magical Wacom Tablet. For someone like me, an ex-fine arts major and a artist at heart, the Tablet is such an amazing tool. I have found that when I'm designing with my Tablet, I feel so much more at one with my computer than when I'm using a mouse. It helps me feel free in my designing, and allows me to work faster.
The reason I tell you all this, is because I get a lot of people asking me how I use my own handwriting in my posts. The answer is the Tablet. Right now I have the Bamboo- which is pretty basic. I got it off of CraigsList for about $40- and it's worked fine for me for blogging. (I'm investing in a better one for design work!) So if you're not doing anything too fancy, the Bamboo is an affordable option that works great for adding that personal touch to your blog posts. (Check out CraigsList and Amazon for good deals!)
Once you have the Tablet, this is how I go about adding my writing to a post. Just warning you- it takes a bit of practice to get used to this thing, don't get discouraged if your handwriting isn't turning out the way you want it to at first. Stay disciplined and practice it everyday, and you'll get better. I promise :)
You can always try and do these steps with a mouse as well, I just find it much more difficult- but if you're ambitious, give it a try!

1) First things first, I use Photoshop for most all of my posts, sizing the canvas to be the same size as the width of my post section of my blog. Mine is 600 px wide.
2) Choose the brush, brush size and hardness. I normally use a brush size around 1-3px wide. Too much larger starts looks funny. I tend to use the normal brush with the hardness around 80-90%. But there are plenty of brushes you can play around with, including ones you can download online to give your writing a custom look. Some look like paint, others pencils, and some chalk. Play around and see what works best for you.

3) Once I have my brush ready, I will create a new layer specifically for my writing. This way I can move it around freely and delete it without messing up my photo.

4) Now it's time to write away! Since handwriting is personal, it seems more like your own voice projecting the words, so keep that in mind when you're deciding your caption. If you can't see yourself saying it, don't write it!
5) Make sure it's legible, place it over a part of the photo that makes it easy to read. (Light area of photo, dark color and vice versa)
6) If you want to write something else on another area, make sure to create a new layer and write on that one, so they're kept separate and easier to edit.

7) And there you have it! You just added your own little personal touch to your blog- just like you used to do in your journals back in the day!
You're a Photoshop pro.

3 comments:
thanks for the great post joanna! i can't live without my wacom anymore, but i had ind of given up with the writing with it...will try again!
I love love love my tablet!! Such a great investment! :)
We should start a I <3 Tablet club :)
Post a Comment